Pages Menu
Categories Menu

Posted by on Dec 2, 2021 in Christmas 2021, Concord and 9th, Cranberry Ink, Iuile watercolor, Mica Watercolor, Simon Says Stamp, watercolor, Winter Floral Mix | 4 comments

Mica Watercolor

I have a new obsession, Mica watercolor! I was watching one of Kristina Warner‘s youtube lives and she was using the most beautiful handmade mica watercolors. So of course I went right over to Etsy and purchased a set, Iuile Watercolor by Jeanie. Now, you should know, I have been pondering the Mica watercolors for several years now. Always at Christmas time. In years past I have been able to talk myself out of them. But, this year I just couldn’t resist anymore!

These watercolors are definitely an investment. Just like any quality watercolor. But, let me tell you they are well worth it!! First of all, the mica colors are just fun to use. Secondly, the colors are rich and vibrant. And, finally who doesn’t love shimmer and shine!!!

As you can see. The pigments show up well on creamy watercolor paper or black watercolor paper. I was looking for bold color. So, I went with black watercolor paper. The paper I used is Van Gogh Black Watercolor Paper.

After deciding which paper to use. The Next step was to pick an image and heat emboss it onto the watercolor paper. I decided on the winter floral mix background stamp by Simon Says Stamp. The embossing powder I used is my favorite! Hero Arts brass embossing powder. I use this embossing powder all the time!!!

Now it was time to watercolor my background! Iuile Watercolor was just super fun to use and surprisingly easy to work with. One key thing to know is you really have to give the water and pigment time to mix before you start painting. Encouraging the two with your brush helps.

When I was done watercoloring. I made two different cards!!! I really don’t want to waste one bit of the watercolor background!

  • This card was heavily inspired by a card design from Online Card Classes, Day 2 of the Holiday Card Workshop 2021.
  • The background is stamped with a poinsettia from Unity Stamps in Cranberry ink (Concord and 9th) on School House Red (Simon Says Stamp).
  • The pearls are Exotic Onyx (Studio Katia) and Matte Gold (Pinkfresh Studio).
  • The sentiment is one I have had a while, Birch Press Sugar Script. It is die-cut from leftover black watercolor paper and I added Star mica watercolor on top.

Here’s a up-close of the shimmer and the background stamping.  I love how the settle stamping adds elegance to the card! 

The second card just might be my favorite card I’ve made in a very long time!  

  • This card uses a classic design that I go back to over and over.
  • The Spruce Paper is embossed using a Diagonal Stripes hot foil plate (Pinkfresh Studio)
  • The Gold and Spruce Paper is from The Paper Source.
  • And that adorable foil sentiment is from Picket Fence Studio, unfortunately, it is long retired.

Below is a list of products used. Affiliate links are used when applicable. 


Thank you for stopping by today!  I hope you have a few minutes to feed your creative soul!


Jennifer

Read More

Posted by on Mar 21, 2018 in Big Shot, Birthday Cards, blog hop, Color Me Happy Stamp Set, Coloring Tools 2017, Die Cuts 2017-2018, Hello Cards, I'm Walking On Sunshine, ink as watercolor, InKing Royalty Blog Hop, Sunshine & Rainbows, Sunshine Sayings Dies, watercolor | 24 comments

Sunshine & Rainbows for the Inking Royalty

Sunshine & Rainbows are out! Well, at least in my mind. It is Inking Royalty Blog Hop Day and I’m super excited!!

Sunsbine & Rainbows

Welcome to InKing Royalty’s March Blog Hop! Today’s hop is filled to the brim with projects that celebrate Spring and Summer. With inspiration from Katrina & the Waves’ song “Walking on Sunshine,” we’ve created projects that share the joy and excitement that accompany warmer weather. We are excited to share our projects with you. After you read my post, I hope you’ll hop over to the next person on the list at the base of this post.

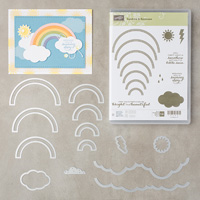
I have been wanting to use the Sunshine & Rainbows bundle for quite some time now!! I love the rainbow that you can build with the dies . And all the extras clouds, a sunshine, lightning, and great sentiments .

Sunshine & Rainbows Bundle

Sunshine & Rainbows Bundle

So, I made a card for today and it set on my desk. I liked the card but, I was not in love with it . It left me filling like, I could do better.  So, after doing a Google search and a quick look at Pinterest .I combined several things that I liked to create 2 cards for you!  Both cards use the same basic ideas. But, they are completely different from each other.

Sunshine & Rainbows

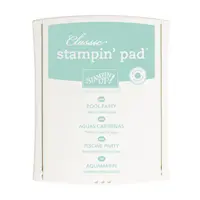
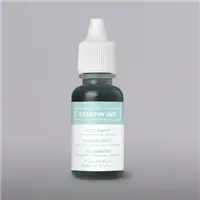
  • The background is stamped on Soft Sky with Pool Party ink
  • The next step was to add some clouds that were die cut. After die cutting them, I added a very thin layer of silver texture paste
  • The sun and clouds are cut from paper that was watercolored . I just used a little ink refills and some water and brushed the color onto hot press watercolor paper.
  • The card base is my favorite Tutti Frutti card bases from Sale-A-Bration.

Sunshine & Rainbows

  • The sentiment is stamped in Island Indigo
  • Then it was popped up with Stampin’ Dimentionals
  • A little sliver thread was added to pick up the sliver in the clouds

The second card also uses a stamped background to create your very own designer series paper and the Tutti Frutti Card Bases. If you do not have these card bases from Sale-A-Bration, you definitely need them!  They are awesome!!! And they are Free when you spend $50.

Rainbows & Sunshine

  • The suns are stamped in Daffodil Delight on So Saffron paper.
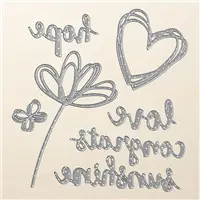
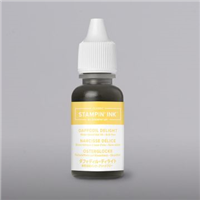
  • The word Sunshine is die cut out of paper that was watercolored with the Daffodil Delight ink refill .  The Sunshine Wishes dies are amazing and pair perfectly with the Sunshine & Rainbows bundle.
  • The Rainbow is also cut from paper that was watercolored with ink refills. I used this paper because I had it on hand . But, card stock would work just as well
  • The Hello is from the Color Me Happy stamp set. I just cut off the oh,

Each of your comments makes me smile! Please, comment HERE.

Thank you for stopping by today.  I hope you’ll hop along to the next stop on the blog hop,  Lynn Kolcun at Avery’s Owlery .There’s lots of inspiration to be found in this group – and you don’t want to miss it!


Sale-A-BrationSale-A-Bration is the most exciting time of the year!  You get to earn FREE EXCLUSIVE PRODUCTS with every $50 you spend.

​Thank you for hopping along with us. If you get stuck during the Blog Hop, please use this line-up as a guide

  1. Brian King at Stamp with Brian
  2. Candy Ford at Stamp Candy
  3. Imogene Thomas at MomoMakes.com
  4. Lisa Pretto at Ink Big Academy Stamps
  5. Robbye Hamilton at Miss Hammie’s Crafts
  6. Sue Jackson at Just Peachy Stamping
  7. Jackie Beers at Blue Line Stamping
  8. Robin Myren at Songbird Designs by Robin
  9. Nina King at InkPaperSequins
  10. Shawn de Oliveira at Shawn Stamps
  11. Pam Morris at Tap Tap Stamp
  12. Denise Hoepfner at The Mountain Magpie
  13. Julie DiMatteo at The Paper Pixie
  14. Rachael Shedeed at Bluebonnet Stampin’
  15. Jennifer Spiller at Westside Paper Creations
  16. Lynn Kolcun at Avery’s OwleryOwlery

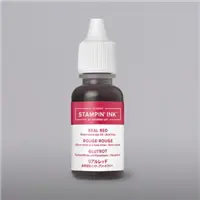
Below is a list of products used,  less the watercolor items, Real Red and Daffodil Delight ink pads:

Note:

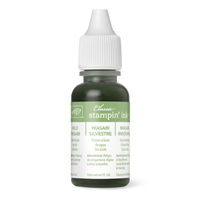
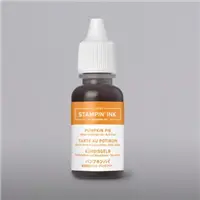
I use paper that I had watercolored for several elements in both cards.  This gave the cards a little variation in colors and a softer look . If you wish not to watercolor the paper for the different elements card stock would work just as well. If you do want to watercolor the paper. All you will need is some watercolor paper, a aqua painter, and ink refills .  The colors used are: Elegant Eggplant ,Island Indigo, Tempting Turquoise, Wild Wasabi, Daffodil Delight, Pumpkin Pie, Real Red. I used made a gradient watercolor wash . This gave me a variety of one color to work with.  The best example of its effect is in the word sunshine and how the color fades .

I used hot press watercolor paper because it is what I had on hand. The Stampin’ Up! cold press watercolor paper or shimmery white would work just as well.  I just happened to be out .

Below is a list of the supplies used:


Thank you for stopping by today! I hope that you enjoy the rest of the blog hop!  Go and be creative my friends!

Peace-

Jennifer

Read More

Posted by on Jan 24, 2018 in Berry Burst, Brusho, InKing Royalty Blog Hop, watercolor | 12 comments

I Think I Love You!

Welcome to InKing Royalty’s January Blog Hop! This year’s Blog Hop themes will be inspired by popular songs – the first is “I Think I Love You.” Our Blog Hop today is jam-packed with projects that are perfect for Valentine’s Day or that showcase love. How sweet is that?! We are excited to share our love-themed creations with you today.After you read my post, I hope you’ll hop over to the next person on the list at the base of this post.

I was thrilled when Stampin’ Up! added Brusho in the Occasions Catalog!  I love making backgrounds for cards with this crystalized form of watercolor.  Brusho makes this process super fun and easy!  Stampin’ Up! offers 5 colors Moss Green, Brilliant Red, Gamboge, Perssian Blue, and Yellow. I tried out all the colors and they are amazing. I can’t wait to do more with these watercolors. In my process, I did add two ink refill colors to the mix Berry Burst and Wisteria Wonder .   I ended up not using the Perssian Blue and Moss Green backgrounds that I made. I did save them for cards later on, so you will be seeing them soon.

To make all the backgrounds I used what I call smooch & slide.  It is basically, using a block for the smooching technique. The twist is that I slide the block around after smooching it to the paper.  Most of the background has layers of watercolor. Created by using a heat tool to dry the paper between layers of smooching. The heat drying creates the hard edges you see.

After the backgrounds dried, I started making the cards.  I originally was going to use the Lots of Lavender set from Sale-A-Bration.  But, quickly decided that the backgrounds were two bold for such a delicate stamp set.  So, I decided to pull out the Sweet and Sassy framelits.  And then I thought a little more about the song for today’s hop …. I Think I Love You.  And that’s when I knew I had to use the Celebrate You Thinlit Dies from Sale-A-Bration. You get them FREE with $100 purchase during Sale-A-Bration. And,  I Think I Love You is exactly how I feel about these dies! They are a must have!!!

The two cards above use the same heart. The top one is outline after die cutting. I had a hard time trying to figure out how to make the heart pop.  I finally landed on the Foil Frenzy Specialty Designer Series Paper. If I was doing this again I might would make it into a shaker card.  The one right above is the actual heart.  This card came together quite quickly! The heart and the you popped up,  to say Love you. And a splash of thread added a little interest. I love making fun backgrounds. Cause it lends itself quite well to clean and beautiful cards. I wish I had added a few sequins to it for a little extra bling…work was calling so I kept things super simple.

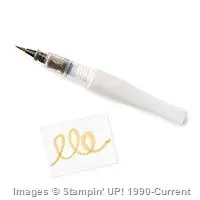
This card is the only card I did no Smooch & Slide with. I simply sprinkled on Brusho and spritz water. And repeated. Then let it dry.  The heart is Berry Burst ink refill that was watered down a bit and I used my wink of Stella pen to add shimmer to it.

It is hard to tell but, the shimmer add a lot of shine to these simple cards.

This is my version of an Eclipse Card. I make them a little different from a lot of people.  Most eclipse cards, for the popped up part they use demintionals.  What I like to do instead is use the die shape stacked on its self. So here I stacked 4 Berry Burst hearts and then the one watercolor heart in top of that.  This give a cool look even from the side! And you can decide how much you want to pop something up!

I hope you can tell how the Berry Burst shows from the side!

The you are simply is from the coordinating stamp set Amazing You. It is FREE with a $50 purchase during Sale-A-Bration. The amazing is die cut from a piece of watercolor background that I did not like as well as the ones I used!  It was perfect for this word die!

Thank you for stopping by today.  I hope you’ll hopalong to the next stop on the blog hop,Julie DiMatteo at The Paper Pixie. There’s lots of inspiration to be found in this group – and you don’t want to miss it!

Thank you for hopping along with us. If you get stuck during the Blog Hop, please use this line-up as a guide:

  1. Mary Fish at Stampin’ Pretty
  2. Brian King at Stamp with Brian
  3. Jackie Beers at Blue Line Stamping
  4. Shawn de Oliveira at Shawn Stamps
  5. Louise Sharp at LouiseSharp.com
  6. Katie Ferguson at Cottage Paper
  7. Rachael Shedeed at Bluebonnet Stampin’
  8. Pam Morris at Tap Tap Stamp
  9. Lisa Pretto at Ink Big Academy Stamps
  10. Robbye Hamilton at Miss Hammie’s Crafts
  11. Jennifer Spiller at Westside Paper Creations
  12. Julie DiMatteo at The Paper Pixie
  13. Sue Jackson at Just Peachy Stamping
  14. Candy Ford at Stamp Candy

I have completely enjoyed sharing with you guys today! Please hope along with the rest of the Royals! I’m sure they all have amazing projects for you today! This group is full of such talent! A special thank you to Mary, Lisa, and Louise for joining us!  You guys are an inspiration to me every day ???

Jennifer

Read More

Posted by on Sep 14, 2017 in Aqua Painters, Coloring Tools 2017, Daniel Smith watercolors, ink as watercolor, Spooky Night, This Little Piggie, Watercolor, watercolor | 1 comment

This little piggie

I love my Stampin’ Up! friends. The Inking Royalty (Brian Kings group) community is such a wonderful place. It is full of people who encourages the creative processes.  And the community is so willing to share ideas and techniques with each other. I just love the positive creative world of  Royals.  I’m telling you all this because, the other day Ann (a fellow Inking Royalty) sent me a card idea!  I was super excited about the idea that we decided to collaborate on the card together.  I happened to have the Halloween paper to make the card special. And she didn’t. So she sent me the idea!!!  I just wanted to take a moment and thank Ann for sharing her amazing creative ideas with me! I love Ann’s work.

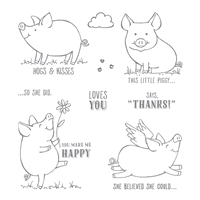
The stamp set We used was the This Little Piggie. This adorable set is full of  little piggies flying, dancing and having fun!!!

This Little Piggie

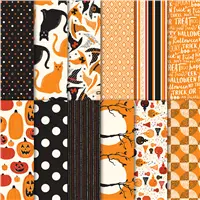
How happy is that piggie with the flower or the flying pig! I just love these little pigs. We decided to pare the pig with the Spooky Nights designer series paper. This paper is full of fun card, witches hats, and festive patterns

Spooky Nights Designer Series Paper

This paper is very Classic Halloween!  The cats are the perfect size to be punched with the Cat Punch. The pumpkins and hats are wonderful fussy cut out!

Is this not the most wonderful idea ever!!! I am so lucky my friend, Ann share her amazing vision with me!

  • The background is Daniel Smith watercolors that are a Genuine. So I used a variety of colors and did two layers of watercolor. The colors are Sugilite, Purpurite, Kyanite, Fuchsite, Hematite Violet.  After this dried I added splatter of mica gold ink and white gouache
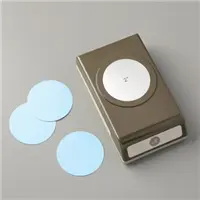
  • The moon is Daffodil Delight and Crushed Curry with mica gold ink on top. The watercolor was punched with a 2 inch circle punch
  • The sweet pig was watercolored with Powder Pink, Flirty Flamingo, and Smokey Slate
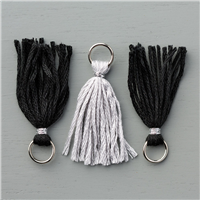
  • The broom is made from the straw in the Coffee Café set. I know, I told y’all I use it all the time. And I do. Even to make brooms.  For the bristles of the broom, I took a tassel with out the loop and glued it to the broom handle (the loop on the tassel was easy to pry open with needle nose pliers
  • The last thing was to pick out a hat.  Witch was fussy cut from the Spooky Nights Designer Series Paper

So, I was lying in bed thinking about the card and wondering how I could make this with just Stampin’ Up! products. Not everyone is as addicted to Daniel Smith watercolor as I am.  Anyway, this is what I came up with …

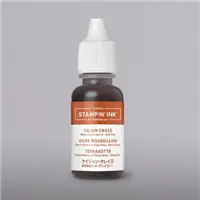
  • The watercolor is Fresh Fig, Berry Bliss, Cajun Craze, Night of Navy, and Pool Party ink refills. I put each color in a small flat dish added a drop or two of Wink of Stella and a few drops of water to each color.
  • Then I added splashes of craft ink that had been watered down a bit
  • The gold was made by watering down a little multipurpose glue and splattering on to the paper. Then adding glitter on top. You want to do this after the watercolor has completely dried. Trust me …I know
  • The moon is Daffodil Delight and Crushed Curry. Then I added in some Gold Wink of Stella
  • The rest of the card is the same!
The card is a A2 card size which is 4 1/4 by 5 1/2 inches.  And the layers are as follows. Buy the way, the mini tassels are on Sale right now in the Clarence Rack for $3. It is such a great deal!!

  • Card base is Fresh Fig cut at 5 1/2 inches  and scored/ burnished at 4 1/4 inches.  The total size of the paper should be 5 1/2 inches by 8 1/2 inches
  • The Basic Black Layer is 5 1/8 inches by 3 7/8 inches
  • The Watercolor Paper is 5 inches by 3 3/4 inches

How stinking cute is Ann’s flying Halloween pig!!! I personally can’t decided which I like better. I think I love the both!

This is what I want you to take away from this experiment.  That if you see a card that is watercolored with certain products from other companies. This does not mean that you can’t make something similar with just Stampin’ Up! Ink Refills.  They are awesome to work with. I love my watercolors and have many sets. I use them all. But, not everyone does. So, use what you have. You may have to get creative. But, normally that’s where the fun is!!!

Each of your comments makes me smile! Please, comment HERE.
The Holiday Catalog is here! I adore this catalog! I know you are loving it as much as I am! It is just full of awesomeness!!!
There is a super exciting stamp set available to all who place $300 order during September and October. Host a party or gather orders from your friends to reach your $300 order! You are going to want this exclusive stamp set! It is amazing!

Here is the supply list.  If you have any questions about today’s card, products used, or Stampin’ Up! feel free to email me at westsidepapercreations@gmail.com


Supply List

 I had so much fun working with Ann on this adorable card! She is super talented. If you would like to see more of Ann’s work check out her Pinterest Boards at MURRAY, INK
Thanks for stopping by today! I hope each of you have a fantastic Thursday!  I’m going to try to squeeze in a little stamping in tonight after work!  I hope you have time to get inky today as well!
Peace my lovelys-

Jennifer

Read More

Posted by on Aug 30, 2017 in At Home With You Bundle, Brick Wall Embossing Folder, Brushwork Alphabet, Build a Bike, Embossing, ink as watercolor, Painted Autumn, watercolor, Watercolor pincles | 2 comments

At Home with you sweet puppy

It is always a sweet moment when a friend brings a new pet home.  A friend recently got a new puppy.  So, of course I had to make them a card that will go along with a gift from my favorite pet store. Come Sit Stay in Nashville, Tn.  This store is amazing and the owner Robin always knows just the right gift! She is amazing at what she does. So when you are in Nashville be sure to stop by her store! You want be disappointed!

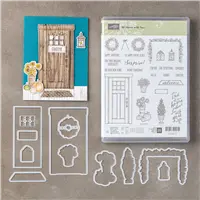
For the card, I used the stamp set bundle At Home With You! This set is super fun! I love the door and all the seasonal decorations!!

At Home With You Bundle

I love the classy modern feel of this stamp set!!! How fun is it to have a beautiful door to decorate.

  • Each element was stamped and then watercolored using watercolor pencils and ink refills.
  • Then using the coordinating dies, each element was cut out
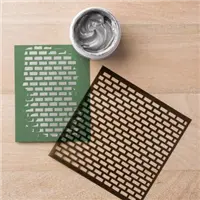
  • The background is the brick walls embossing folder and the Painted Autumn Designer Series Paper(available Sep. 1)
  • The door has a special die that cuts it on three sides allowing the door to open.
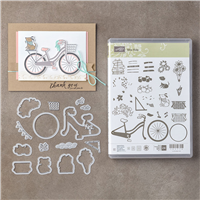
  • That cute little dog is from the build a bike bundle. Is he not just adorable in front of the door…

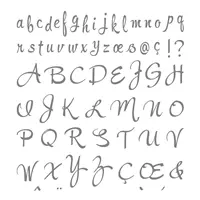
The door opens up for a sweet message. That was created using a little masking, stamp surgery (yes I cut a sentiment in half ?…it will be okay ?. I put him back together with ❤ …?), and the Brushwork Alphabet set.

Each of your comments makes me smile! Please, comment HERE.

The Holiday Catalog goes live on September 1st!! If you would like a copy just let me know via email. I will be happy to send you one!

The Carols of Christmas Early Release is now available for you to purchase. You are going to love this set so much. It is my must have from the Holiday Catalog. It is amazing!!! So very easy to use and just simply perfect!!! It will remind you of why you love stamping in the first place. The stamp set pairs with the Card front builder dies! These dies rock!!!! They will make every Holiday Card sing in glory!!!!

There is a Paper Pumpkin sale going on and it is pretty sweet! This is definitely the time to join!!!

Here is the supply list.  If you have any questions about today’s card, products used, or Stampin’ Up! feel free to email me at westsidepapercreations@gmail.com

Supply List

Happy Wednesday! I have been thinking a lot lately about how we can share our creativity to #spreadkindness.  Sending cards and making pretty things for others defantly makes the world a better place.  Stay creative my friends
Peace out-

Jennifer

Read More