Tricked out Treats with the Inking Royalty

Welcome to InKing Royalty’s September Blog Hop! Today’s Tricked Out Treats Blog Hop is filled with spooky, fun projects for Halloween. We are excited to share our creations with you today and hope these projects inspire you. After you read my post, I hope you’ll hop over to the next person on the list at the base of this post.
I am so excited that we have the uber talented Lydia Fiedler joining us on the hop today! I adore Lydia as a friend and her artsy talent! She is one of my favorite sources of crafty goodness! Welcome, Lydia! And thank you for joining us today for the Royal Hop!! She gets to be a Royal for a day!! Yeppie!! The fabulous Lisa Pretto is also joining us!! I adore Lisa and all that she does for the Stampin’ Up! Community!!! truly we have the most amazing ladies with us today!!! Huggs and Kisses to you both!
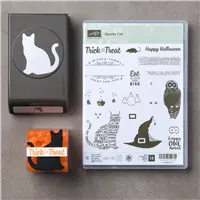
I decided to step out side my normal card box and make a treat holder for you guys! But, then I could not help myself and made a card to go along with the treat box! For both projects, I used the Spooky Cat bundle and the Spooky Nights Designer Series Paper. I can’t begin to tell you how much I like the cat punch! It is probably my favorite punch in a very long time! I am just reaching for it all the time.

Spooky Cat Bundle
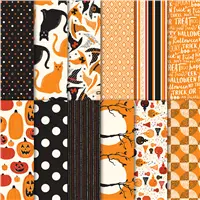
The Spooky Night Designer Series Paper coordinates with the punch. And is perfect for all your Halloween Crafting!

Spooky Night Designer Series Paper
The pumpkins and hats are adorable and fussy cut super easy. The polka dots are just adorable. And the cats are just the right size to punch with the cat punch!!!
I surfed through some of my favorite blogs that make 3-D items a lot. And came across a box that was made from a 6×6 piece of Designer Series Paper over at Pootles. It is the perfect size for a “fun size” candy bar. Witch ment it was just right for a Halloween treat!

Each box was made with 12 x 22 Designer Series Paper. You get 4 boxes per sheet of Designer Series Paper. Then I used the Spooky Cat bundle to decorate the boxes.
Here’s the scoring and cutting info:
- the paper should be 6×6
- Score at 1 1/2 and 4 1/2 inches
- On the other side score st 1 1/2 , 2 1/4, 3 3/4, and 4 1/2
- Burnish all score lines
- On the side with four score lines you will cut up to where it intersects with the other score line
- Then you will cut away a few sections. (See below)

Above is a picture of the template that I made. You will want to cut away the parts that I have scribbled on. Also, the Black lines are the score lines. So you can see you don’t cut away the entire flap So that you end up with something that looks like this.

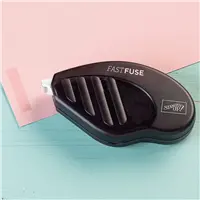
The next step is to add glue to the sections that were left after cutting! I used the fast fuse for this. It is very rare that I reach for this over the multipurpose glue. In this case fast fuse was perfect!
TRICKED OUT-
I used a piece of leftover backing from the multipurpose adhesive sheet. The tape in fast fuse will not stick to the backing. So, it is perfect for when you want to run the tape from edge to edge of a piece of paper.

I added fast fuse to the orange sections that are folded over. All that is left is to put the box together. The bottom two orange sections glue to the long tab that is in between them. This makes the box. The top section with fast fuse adheres to the top tab. This makes the top. You want to repeat the process on both sides.

This is such a fun box with designer series paper. I love how when you open it the inside paper is just a pretty as the outside.

The hinged lid makes this box unique. Now, you can use a 1/2 inch circle punch to add a little notch to the bottom of the lid making it easy to open. I opted not to. Also, if you have any questions about making the box feel free to contact me via email. Pootles has a wonderful video on how to make this box.

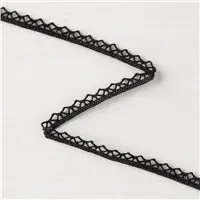
Now, y’all know I couldn’t let the day go by without showing you the cat! Is he not adorable. Paper crafting could not get any easier. The fun scarf is the Vintage Crochet Trim. I love this trim! It tied just like a real scarf!! How cool is that!!!

- The cat’s ear peeking out is something I have been thinking about ever since I saw the hats. I used a exact-o knife to cut a slit for the ear to peep out
- The orange layer is embossed with the quilt top texture embossing folder. This folder is quickly becoming a favorite!
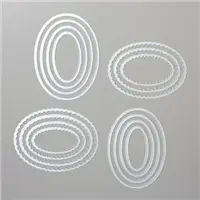
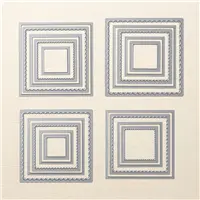
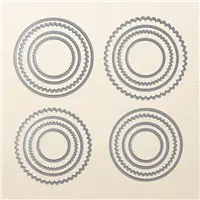
- The stitched layering dies make a plain square something special
Each of your comments makes me smile! Please, comment HERE.
Thank you for hopping along with us. If you get stuck during the Blog Hop, please use this line-up as a guide:
The Holiday Catalog is here! I adore this catalog! I know you are loving it as much as I am! It is just full of awesomeness!!!
- Lydia Fiedler at Understand Blue
- Brian King at Stamp with Brian
- Jennifer Spiller at Westside Paper Creations
- Julie DiMatteo at The Paper Pixie
- Lisa Pretto at Ink Big Academy Stamps
- Shawn de Oliveira at Shawn Stamps
- Lynn Kolcun at Avery’s Owlery
- Sheryl Sharp at Sharp Notes by Sheryl
- Robin Myren at Songbird Designs by Robin
- Racheal Shedeed at Bluebonnet Stampin’
- Jackie Beers at Blue Line Stamping
- Karen Browning at Karen Z Browning
- Candy Ford at Stamp Candy

There is a super exciting stamp set available to all who place $300 order during September and October. Host a party or gather orders from your friends to reach your $300 order! You are going to want this exclusive stamp set! It is amazing!

Here is the supply list. If you have any questions about today’s card, products used, or Stampin’ Up! feel free to email me at westsidepapercreations@gmail.com
Thank you for stopping by today. I hope you’ll hopalong to the next stop on the blog hop, Julie DiMatteo at The Paper Pixie. There’s lots of inspiration to be found in this group – and you don’t want to miss it!
My Tricked out tip for you today I learned from watching way too many you tube videos. The always fabulous Jennifer McGuire gave the adhesive sheet tip in a video I was watching! It really pays to be addicted to card videos. Anyway, try it out for yourself. It is really useful when lining envelopes. And for boxes like today!
Peace and happiness my friends-









 Is this not the most wonderful idea ever!!! I am so lucky my friend, Ann share her amazing vision with me!





 This Site Proudly Designed & Maintained by Integrant Services, LLC