Pages Menu
Categories Menu

Posted by on Aug 30, 2017 in At Home With You Bundle, Brick Wall Embossing Folder, Brushwork Alphabet, Build a Bike, Embossing, ink as watercolor, Painted Autumn, watercolor, Watercolor pincles | 3 comments

At Home with you sweet puppy

It is always a sweet moment when a friend brings a new pet home.  A friend recently got a new puppy.  So, of course I had to make them a card that will go along with a gift from my favorite pet store. Come Sit Stay in Nashville, Tn.  This store is amazing and the owner Robin always knows just the right gift! She is amazing at what she does. So when you are in Nashville be sure to stop by her store! You want be disappointed!

For the card, I used the stamp set bundle At Home With You! This set is super fun! I love the door and all the seasonal decorations!!

At Home With You Bundle

I love the classy modern feel of this stamp set!!! How fun is it to have a beautiful door to decorate.

  • Each element was stamped and then watercolored using watercolor pencils and ink refills.
  • Then using the coordinating dies, each element was cut out
  • The background is the brick walls embossing folder and the Painted Autumn Designer Series Paper(available Sep. 1)
  • The door has a special die that cuts it on three sides allowing the door to open.
  • That cute little dog is from the build a bike bundle. Is he not just adorable in front of the door…

The door opens up for a sweet message. That was created using a little masking, stamp surgery (yes I cut a sentiment in half ?…it will be okay ?. I put him back together with ❤ …?), and the Brushwork Alphabet set.

Each of your comments makes me smile! Please, comment HERE.

The Holiday Catalog goes live on September 1st!! If you would like a copy just let me know via email. I will be happy to send you one!

The Carols of Christmas Early Release is now available for you to purchase. You are going to love this set so much. It is my must have from the Holiday Catalog. It is amazing!!! So very easy to use and just simply perfect!!! It will remind you of why you love stamping in the first place. The stamp set pairs with the Card front builder dies! These dies rock!!!! They will make every Holiday Card sing in glory!!!!

There is a Paper Pumpkin sale going on and it is pretty sweet! This is definitely the time to join!!!

Here is the supply list.  If you have any questions about today’s card, products used, or Stampin’ Up! feel free to email me at westsidepapercreations@gmail.com

Supply List

Happy Wednesday! I have been thinking a lot lately about how we can share our creativity to #spreadkindness.  Sending cards and making pretty things for others defantly makes the world a better place.  Stay creative my friends
Peace out-

Jennifer

Read More

Posted by on Aug 27, 2017 in Gelli Plate, Monoprinting, Oh So Eclectic | 2 comments

Gallery Style Wall Art

I love using my stamps for something besides cards.  It is always nice to stumble across an idea and it work out! While I was using my gelli plate the other day to make a background on glossy paper.  I decided to try some other ways of printing with my Stampin’ Up! inks.  I selected the colors based on a Faux Batik idea that didn’t quite pan out.  I tell you this because, this fail is what made me start looking for other ways to layer the colors like I wanted.  That’s when I saw my gelli plate still on the table.  So I tried it out…I was thrilled!!

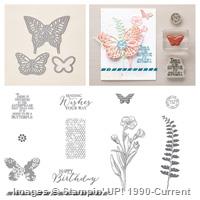
One of my all time favorite stamps is the fern in the Butterfly Basics stamp set. This is another wonderful stamp that has been neglected for way to long.   Of course I had to get it inky!

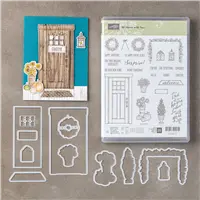
Butterfly Basics Stamp Set

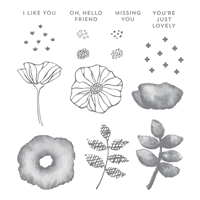
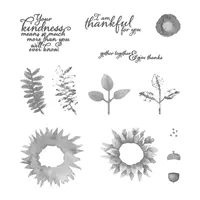
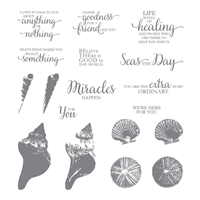
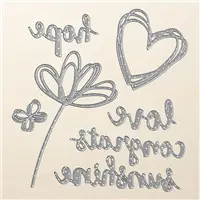
I paired the fern with a new stamp in oh So Eclectic.  This is a fun set that has several images that look like watercolor. I chose the leaf
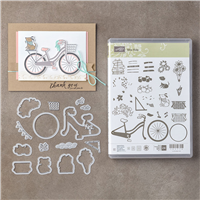
Oh So Eclectic

I love the verity of fun images that is in this set! It is happy and full of life!!!

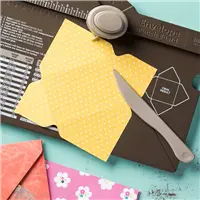
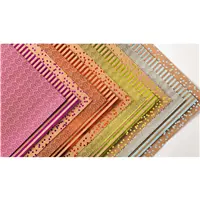
My gelli plate is 5×7 and is the perfect size to make small gallery inspired prints.  The process is basically the same.  You can add ink or stamped images to the gel plate. Press the plate onto paper. And lift up.  And repeat. … That’s the basics. I made several that I’m planning on hanging on the wall at work in a collage format. For each one I will tell you what I did.  The paper I used for almost all the prints is mix media paper.  I love this paper because it has a vellum finish and is thick!  So it can handle a lot…I used it today because, I’m not planning on framing these prints.  The thick paper will look nice all on its own!

As it turned out I really enjoy the process of monoprinting with the gelli plate. I could do this all day! The first three are just basic prints. (I’m shareing others later in the week)  You can see in the above picture that the two smaller prints are on watercolor paper.  You can tell a difference in how the printing looks on that paper vs. the mixed media paper in the middle.

This first print is just basic stamp printing.  The first thing I did was ink the gelli plate with Dapper Denim.  I pressed this off on a scrap piece of paper. The second step was to stamp the leaf stamp into the plate. There was still ink on the plate so this created a very faint shadow image.  This time I pressed the plate onto the paper I was planning on using. Then stamping on to the gel plate with Pool Party ink and Dapper Denim. The fern and leaf images. The last step was to press a second print on top of the first print

The is the same process as above.  The main difference in the look is that I combined Pool Patty and Dapper Denim on the first background print.  This gave it a greenish tent.

This monoprint was lots of fun! You can see how much smother the ink is on the mixed media paper vs. the hot press watercolor paper.

For this print, I pressed both the Pool Party and the Dapper Denim ink pads directly onto the gel plate. Then I lightly spritz with water. Using the fern image I stamped into the spritz water. Then stamped off on a piece of shimmery white.  I wanted to keep the image for a later project.  I repeated the stamping several times.  Then, made my first print. At this point it will look something like this.

Pretty rough, huh?

The next press is stamped ferns onto the plate with both Pool Party and Dapper Denim.  Then You want to press this print on top of the first print!

At this point I knew the print was starting to take shape.  I did this process one more time. Then, added some Dapper Denim ferns directly to the paper.

At this point let your print dry.  I learned the hard way that embossing powder really loves the inky prints.  After it was dry.  I added a silver fern that was heat embossed.

I love how the heat embossed image shines on the monoprint background.  I have three more monoprints to share with you later in the week.  You will love them! I add a few extra elements to them that really brings a wow factor!

[Comment]

The Holiday Catalog goes live on September 1st!! If you would like a copy just let me know via email. I will be happy to send you one!

The Carols of Christmas Early Release is now available for you to purchase. You are going to love this set so much. It is my must have from the Holiday Catalog. It is amazing!!! So very easy to use and just simply perfect!!! It will remind you of why you love stamping in the first place. The stamp set pairs with the Card front builder dies! These dies rock!!!! They will make every Holiday Card sing in glory!!!!

There is a Paper Pumpkin sale going on and it is pretty sweet! This is definitely the time to join!!!

Here is the supply list.  If you have any questions about today’s card, products used, or Stampin’ Up! feel free to email me at westsidepapercreations@gmail.com

Besides my Stampin’ Up! supplies, I used a Gelli Plate and Mixed Media paper.


Thanks for stopping buy on this amazing Sunday.  I hope each of you have a blessed day!  If you make your own gallery prints I would love to see them. You can always tag me on social media or email me pictures.  Happy creating!

Peace my friends-

Jennifer

Read More

Posted by on Aug 24, 2017 in Copper Embossing Powder, Embossing, Faux Batik, Feather Together, Heat Embossing | 0 comments

Feather Together

I loved yesterday’s Inking Royalty blog hop! It was so much fun hopping with my stamping friends.    If you would like to see the Fall Fav. Hop click here.   What awesome fall inspiration was shared!

My card for you today is a Faux Batik card using the Feather Together Stamp Set.  I love feather stamps. And have owned several over the years.  This one is just extra lovely to me!

Feather Together

This is a stamp layering set.  So you can layer the stamps to make a feather that looks like it has dimension.

Faux Batik is one of those techniques that I just can’t get enough of right now! I am just loving it!

  • The colors used are Always Artichoke, Bermuda Bay, and Crushed Curry
  • I picked three of the feather layers and heat embossed them onto tissue paper for the Faux Batik technique.
  • I taped a border using painters tape on shimmery white paper
  • After adding the embossing to the tissue, lay the tissue over your paper (shimmery White in this case)  and use a baby whips to add color to the tissue.  This will “transfer” the image to the card.
  • The sentiment is heat embossed with copper embossing powder
  • The copper foil and the Smoky Slate card base lightens up the card! This make the feathers pop!

Each of your comments makes me smile! Please, comment HERE.

If you would like to know more about the Faux Batik  technique check out this post.

The Holiday Catalog goes live on September 1st!! If you would like a copy just let me know via email. I will be happy to send you one!

The Carols of Christmas Early Release is now available for you to purchase. You are going to love this set so much. It is my must have from the Holiday Catalog. It is amazing!!! So very easy to use and just simply perfect!!! It will remind you of why you love stamping in the first place. The stamp set pairs with the Card front builder dies! These dies rock!!!! They will make every Holiday Card sing in glory!!!!

There is a Paper Pumpkin sale going on and it is pretty sweet! This is definitely the time to join!!!

Here is the supply list.  If you have any questions about today’s card, products used, or Stampin’ Up! feel free to email me at westsidepapercreations@gmail.com


Supply List

 I am so happy you stopped by on this beautiful Thursday! We just have today and tomorrow untill we get to another crafty Weekend! Yeppie.   Have a great day, be creative, spread kindness, and share your craft with others!!!
Peace my friends-

Jennifer

Read More

Posted by on Aug 23, 2017 in At Home With You Bundle | 9 comments

Fall Favs. with the Inking Royalty

Welcome to InKing Royalty’s August Blog Hop!  Today’s Blog Hop is filled with projects inspired by some of our favorite Fall-themed products.  What fun!  Stampin’ Up!’s catalogs (both the Annual Catalog and soon-to-be-released Holiday Catalog) are filled with so many fun products for the Autumn holidays – and we are excited to share our creations with you today.  After you read my post, I hope you’ll hop over to the next person on the list at the base of this post.

I just have to take a moment and welcome our Guest Designer for the blog hop! Kim Jolly!!! Yeppie! Kim is a wonderful friend who makes the most amazing cards!!! If you don’t know Kim’s work, you are in for a special treat!!! Well, for that matter we all are!! Kim is awesome!! Welcome and I’m so happy you are hopping along with us!!!! ?

I thought a lot about what I waned to share with you guys today, so many wonderful choices.  In the end I settled on At Home With You Bundle. A wonderful stamp and die set in the Annual Catalog. This set is perfect for seasonal cards.   It features a door and all the different things you need to decorate it during the year.

At Home With You Bundle

How fun is that ! I love how Stampin’ Up! Thinks of all the details!  The door mat, the lantern, and seasonal decorations really makes this stamp set special!!!  I paired the sunflowers, galvanized pot, and pumpkin image with the brick decorative mask.  

  • The sunflowers were stamped in Basic Black.  Then using colored Pencils(I used Prismacolor) color the images.  Finally die cut it with the coordinating dies.
  • The background is embossing paste with mixed metal gilding leaf added to it! I mixed a drop of Sahara Sand ink refill to some embossing paste. Added the color through the stencil. Finally, adding the leafing on top.
  • The linen thread added a little extra texture and interest to the card.
  • The sentiment is from Painted Harvest. This is an awesome stamp set in the up coming Holiday Catalog.  You are going to want it!!! Promise
  • The colors used are Cajun Craze, Crushed Curry,  Sahara Sand, and Basic Black

Each of your comments makes me smile! Please, comment HERE.

You guys know how much I am loving square cards right now!  This little square is 4 1/2 by 4 1/2 inches.  To make the card base cut your Crushed Curry card stock so that it is 4 1/2 by 9. Score and burnish at 4 1/2 inches on the 9 inch side.  The layers are as fallows, Gilded Whisper White 4 3/ 8 by 4 3/8 inches, Basic Black 4 1/8 by 4 1/8 inches, and Cajun Craze 4 by 4 inches.

The envelope was made using the envelope punch board.  Using the app Envelope Generator, I put in the size of card and it gives me the measurements I need to make an envelope with the punch board.  For this 4 1/2 by 4 1/2 card.  You need a 7 3/8 by 7 3/8 inches piece of card stock.  Then you will start punching and scoring at 3 5/8. Rotating after each punch and scoring series.  After all four sides are punched and scored, burnish each score line. The final step is to put it together.  I use tear and tape on the top flap.  So it is ready to go !!!

I have been wanting to share with you guys how I make all my gilded paper elements! I hope y’all enjoy.  It is a bit long (sorry) but, I had a lot I wanted to share with you.  The video shows you four different ways to use gilding in your paper projects. Gilding can be quite messy.  As you will see! I highly suggest a box lid or something similar to contain the mess.  Also, swifter cleaning wipes are quite handy! And, try not to have glue on your fingers ???? I will say that my gilding love all started because of a video I saw by Jennifer McGuire. So, it’s all her fault if you get messy trying this ? It is well worth the mess. And the more you do the technique the better you will become at controlling the mess.

 Here’s up close pictures of the last two samples in the video!

The layered leaves dynamic embossing folder is perfect for adding little touches of gilding

The Naturly Eclectic Designer Series Paper lends itself quite perfectly to gilding. Maybe, because of it’s watercolor look?

Thank you for stopping by today.  I hope you’ll hop along to the next stop on the blog hopBrian King, Stamp With Brian There’s lots of inspiration to be found in this group – and you don’t want to miss it!

A new live class registration is open.  We will be using the Coffee Cafe’ and Merry Cafe’ stamp sets! The class is August 26th from 1-3 at Westside  Coffee Place & Café

​Thank you for hopping along with us. If you get stuck during the Blog Hop, please use this line-up as a guide:


  1. Brian King at Stamp with Brian
  2. Candy Ford at Stamp Candy
  3. Jackie Beers at Blue Line Stamping
  4. Kim Jolley at Stampin’ Artfully
  5. Julie DiMatteo at The Paper Pixie
  6. Robbye Hamilton at Miss Hammie’s Crafts
  7. Lisa Pretto at Ink Big Academy Stamps
  8. Lynn Kolcun at Avery’s Owlery
  9. Robin Myren at Songbird Designs by Robin
  10. Racheal Shedeed at Bluebonnet Stampin’
  11. Shawn de Oliveira at Shawn Stamps
  12. Sue Jackson at Just Peachy Stamping
  13. Jennifer Spiller at Westside Paper Creations

The Holiday Catalog goes live on September 1st!! If you would like a copy just let me know via email. I will be happy to send you one!

The Carols of Christmas Early Release is now available for you to purchase. You are going to love this set so much. It is my must have from the Holiday Catalog. It is amazing!!! So very easy to use and just simply perfect!!! It will remind you of why you love stamping in the first place. The stamp set pairs with the Card front builder dies! These dies rock!!!! They will make every Holiday Card sing in glory!!!!

There is a Paper Pumpkin sale going on and it is pretty sweet! This is definitely the time to join!!!

Here is the supply list.  If you have any questions about today’s card, products used, or Stampin’ Up! feel free to email me at westsidepapercreations@gmail.com

Price: $110.00


I am so happy to be apart of such a talented group! They make it awesome to be apart of Stampin’ Up!  I hope each of you will hop along with us today!!

✌-

Jennifer

Read More

Posted by on Aug 21, 2017 in Beautiful You, Brushwork Alphabet, Eclipse, Jars of Love, Labeler Alphabet, Painted Autumn, Wood Words | 4 comments

Total Eclipse…

It is finally here! Today is Total Solar Eclipse day! Yeppie!! We get to listen to Dark Side of the Moon and Total Eclipse of my Heart over and over!!! What fun ?  Seriously, though it’s a big event in the USA.   I’m really excited about getting to see the Eclipse. No, no, I’m not going anywhere special to see it or look at it with out my eclipse glasses.  But, I am going to look at the shadows it creates on the ground through trees.  I plan on looking for some stars and planets that will be viable.  And well just enjoy the experience of a solar eclipse! It’s going to be fun watching all the people who have their head in a box.  literally in a box!!!!!   I just might be one of them!

 To celebrate the moon’s great photobomb moment, I made some cards featuring my own solar eclipse.  I have a whole little collection of cards.  So let’s get started.    

I love trying to stretch my supplies!  It is fun to see how just using a few supplies you can make several completely different cards.  Just by changing the design or shape of the card you get something completely new!

To make my eclipse I used the Painted Harvest Stamp Set. (Available Sep. 1)  I love this stamp set! It is just perfect for fall.  The sunflowers it creates are beautiful!  It also has a fern, leaves, and an acorn.

Painted Harvest

I also used a mask made from vellum and a 1 1/2 inch circle punch. The sentiment come from a variety of places.  Jar’s of Love has a tinny “you light up my life”   So many Shells has “miracles happen”   Beautiful You has “wishing you brighter days to come”   The hope and sunshine are dies from sunshine wishes.  There are some other really amazing sentiments in the Annual catalog that would be awesome for an Eclipse card. Expecially the High Tide and Watts of Occasions!

The cards all have a few things in common.  The Eclipse, the use of Whisper White, metallic, and Tranquil Tide.

This little mini card is 3 by 3! The card base is basic gray. The Designer Series Paper is Painted Autumn.   I took this card and added a few more layers to it to make a larger square card.  Both cards have the same design concept.

I love the little mini cards. They are just to adorable.  I also love that you can transform that mini card into a full size card. By just adding a background frame.

I added a copper layer to the original mini card.  Then added the Tangerine Tango Foil Frenzy paper to create a card base.

Both of these cards use the same basic card design.  The “miracles happen” card is a 4 bar card.  The total eclipse card is the same design popped up on a card base and copper twine added.   I used two different alphabet sets to create my own sentiment. Brushwork Alphabet and Labeler Alphabet.  I just couldn’t resist making a card that says Total Eclipse …of the heart.   

That adorable yellow heart is out of Wood Words!

The next two card use lots of the same elements but, they are arranged in a way on each card that makes each card their very own!

The hope is cut from the Soft Sky Foil Frenzy DSP.  Then is stacked on three Tranquil Tide hope die cuts. I used silver foil for one of the layers for some extra shine.  Though it looks more copper or gold in the picture. 

The sunshine die cut is stacked just like the hope.   The difference is that I used silver leafing with just a touch of gold and copper to guild the word.

To make the eclipse, stamp one of the two sunflower layers from Painted Harvest in Daffodil Delight.  Then I made a mask with vellum and a 1 1/2 inch punch.  Lade the mask over the flower and used a sponge dabber to add basic gray ink.  You can still see the yellow through the gray after it dries.  I think this added to the look of the eclipse.

Each of your comments makes me smile! Please, comment HERE.

If you would like to know more about the solar eclipse, including how to make your own solar glasses…

A new live class registration is open.  We will be using the Coffee Cafe’ and Merry Cafe’ stamp sets! The class is August 26th from 1-3 at Westside  Coffee Place & Café

Sign Up now!

The Holiday Catalog goes live on September 1st!! If you would like a copy just let me know via email. I will be happy to send you one!

The Carols of Christmas Early Release is now available for you to purchase. You are going to love this set so much. It is my must have from the Holiday Catalog. It is amazing!!! So very easy to use and just simply perfect!!! It will remind you of why you love stamping in the first place. The stamp set pairs with the Card front builder dies! These dies rock!!!! They will make every Holiday Card sing in glory!!!!

There is a Paper Pumpkin sale going on and it is pretty sweet! This is definitely the time to join!!!

Here is the supply list.  If you have any questions about today’s card, products used, or Stampin’ Up! feel free to email me at westsidepapercreations@gmail.com


Price: $110.00

Supply List

I hope everyone has a safe day enjoying the eclipse. Here in North Alabama we will have about 98% coverage during totality of the eclipse. I know you know this but, don’t look at it directly unless you have the correct protection.  Have a great Eclipse Monday!

Peace be with you all-


Jennifer

Read More