Posted by Jennifer Spiller on Aug 12, 2017 in Happy Birthday Gorgeous, Heat Embossing, Message in a Bottle, Playful Backgrounds, Silver Embossing Powder |
This week has been full of excitement! Everything from being picked as a Team Choice over at the Tic Tac Toe Challenge!!! Yeppie! You can see my card here and the other chice designers here. 
The Pal’s blog hop was Wednesday! This day is always fun and full of inspiration! If you missed the hop. Check it out here!!!
And then yesterday I was Guest Designer on Brian’s blog at Stamp with Brian. I was super honored to share a cool technique with his readers.
Today I am sharing with you a card that was made from a piece of tissue after doing the Faux Batik technique. If you would like to see the Batik card you can click here.
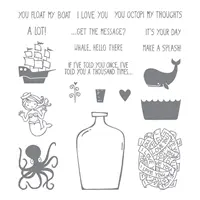
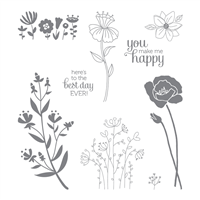
I really wanted to use the circles for a water scene. The obvious choice was, Magical Mermaid. But, I wanted to try something different! Therefor I went with Message in a Bottle.

Message in a Bottle
This is one of the most adorable stamp sets ever!!! I have been in love with it ever sence my friend Shawn made a card with it! He used the octopus and the message “you octopi my thoughts” . How precious and adorable is that. Anyway, I have wanted to use this stamp set ever sence. So, today is the perfect opportunity!!!

- The background is Playful Backgrounds stamped on tissue paper and heat embossed with silver embossing powder
- The colors used for the background are Pool Party, Bermuda Bay, and Tranquil Tide
- Then I added ink to it using the Faux Batik technique. Instead of discarding the tissue paper. I let it dry and made this background.
- After the tissue is dry, I mixed multipurpose glue a little water. Painted it onto a piece of cardstock. Then added the tissue on top.
- The bottle is stamped in Basic Black., the water in Pool Party, and the whale in Basic Gray
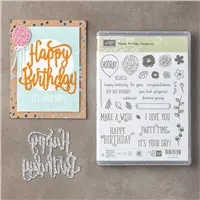
- The sentiment is stamped inside the classic label in the Happy Birthday Georgius stamp set . Then punched with the classic label punch
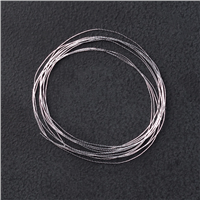
- It is hard to see in the card, but, I added a little silver thread and some metallic enamel dots
The card base is Daffodil Delight with Basic Gray layered on top!
Here is a close up of the water bubbles and the bottle!

Each of your comments makes me smile! Please, comment HERE.
The Carols of Christmas Early Release is now available for you to purchase. You are going to love this set so much. It is my must have from the Holiday Catalog. It is amazing!!! So very easy to use and just simply perfect!!! It will remind you of why you love stamping in the first place. The stamp set pairs with the Card front builder dies! These dies rock!!!! They will make every Holiday Card sing in glory!!!!

There is a Paper Pumpkin sale going on and it is pretty sweet! This is definitely the time to join!!!

Here is a list of items used to make this card. If you have any questions about this card feel free to contact me at [email protected]
Supply List
Thanks for stopping by! I have really enjoyed sharing with you guys this week! I hope each of you have a awesome weekend!!! Let’s all find a little time to be creative and shre what we love with others!!!
Peace my friends-
Jennifer
Posted by Jennifer Spiller on Aug 11, 2017 in Embossing, Faux Batik, Flirty Flowers, Heat Embossing, Silver Embossing Powder, Wood Plank Texture Impressions Embossing Folder |
I have had so much fun playing with the Faux Batik technique over the past couple of weeks. And, I’m so very excited to show you how to achieve beautiful Batik with stamped images. My friend, and Inking Royalty Team Leader, Brian King invited me to be a Guest Stamper on his blog. Thank You Brian, for this awesome opportunity!!! I am truly honored to be a Guest on your blog and apart of the Inking Royalty. And Thank you to all of those who have hopped over from his blog to see more detail about the Faux Batik process.
Batik is a wax resist that is used for fabric dyeing. The process of Batik can also be used in other mediums, such as rice paper watercolor. I fallow a lot of artist on Instagram. It is one of the places that I go to for inspiration. One of the artist, Emily Jeffords, that I fallow has been doing a lot with Batik and painting. Her batiks are amazing. And made me want to try to make something similar for cards.
For the Faux Batik technique, I have found that it works best with stamped images that are more solid. Verses ones that have lots of details or are sketchy looking. Batiking is a very organic looking process. There for flowers and leaves are really beautiful with the Faux batik. The Flirty Flowers stamp set is just perfect.

This stamp set is so happy and the flowers have such a fresh feel.
Today, I am sharing details for the Faux Batik techniques with you. Also, at the bottom of the post is a video if you would like to see the technique in action. If you have any questions about the technique feel free to email me at [email protected] If you would like to see other cards featuring this technique click here and here
The first step is to gather up the supplies that you will need. This includes tissue paper, shimmery white cardstock, versamark ink, embossing powder, embossing buddy, heat tool, inks of your choice, stamps, and baby wipes
After you have gathered up your supplies, the next step is to heat emboss a stamped image onto the tissue paper. To do this you will need your versamark ink, embossing powder, embossing buddy, and heat tool. Be sure to use the embossing buddy first. This will help keep stray embossing powder form sticking in unwanted areas. After using the embossing buddy, you want to stamp the image with versamark, add the embossing powder, pour off any access powder, and heat set the image.

After you have the tissue paper embossed. It is time to make a Batik image!! To do this you need to place the tissue paper over the shimmery white card stock.

The next step is to start adding ink to the tissue paper with a baby wipe. I work from lightest color to darkest color. In this case Pool Party was the first color added .

This is what is should look simular to after adding the first color

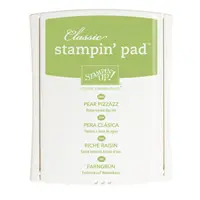
Then, Pear Pizzazz

and Finally, Old Olive.

After adding the Old Olive ink. You can go back to your lightest color and add more if you like. The final step is to remove the tissue paper to reveal your Faux Batik

You can use your tissue paper more than once if you are using the same colors. Also, do not throw your tissue paper away. You can use this for another card showing off the pretty embossing. I used silver embossing powder for my card. And I am planning a second card that uses the tissue paper layer. I love the look of the metallic embossing powders with the ink around them. Also, this technique works very well on Whisper White Card Stock.
When using a bold technique, like this Faux Batik, it is best to keep the rest of the card quite simple. This allows for your handy work to shine.

- After the Faux Batik has dried it is time to add a sentiment. I chose one from the upcoming Holiday Catalog. This sentiment is in the Painted Harvest stamp set (available Sep 1) . It is stamped in Early Espresso ink
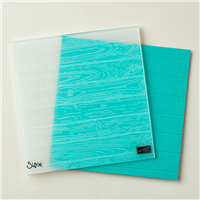
- The background is the pinewood Plank texture impression embossing folder. Use the folder to emboss Early Espresso cardstock. After embossing, I added some gold leafing to the texture. This give it a shimmery weathered look.
- The only thing left is to put the card together and pop up the Faux Batik
This card is a standard A2 card (4 1/4 by 5 1/2) . The card base is made from a 8 1/2 by 11 Early Espresso cardstock cut in half at 5 1/2 inches on the 11 side and scored at 4 1/4 inches. Each layer is as follows. Pear Pizzazz 4 1/8 by 5 3/8 inches. Early Espresso 4 by 5 1/4 inches and embossed with the pinewood planks embossing folder. Pear Pizzazz 3 1/4 by 4 5/8 inches . Shimmery White with Faux Batik 3 1/8 by 4 1/2 inches
Each of your comments makes me smile! Please, comment HERE.
The Carols of Christmas Early Release is now available for you to purchase. You are going to love this set so much. It is my must have from the Holiday Catalog. It is amazing!!! So very easy to use and just simply perfect!!! It will remind you of why you love stamping in the first place. The stamp set pairs with the Card front builder dies! These dies rock!!!! They will make every Holiday Card sing in glory!!!!

Thank you for stopping by!! I so enjoyed sharing this fun technique with you!! I hope each of you have a fablous Friday!! And that you have a moment to be creative and share your creative flow with others!!
Peace & Happiness-
Jennifer