Posted by Jennifer Spiller on Sep 23, 2015 in Black Glimmer Paper, Dove of Peace, Happy Haunting Designer Series Paper, Heat Embossing, Jolly Christmas |
I always gravitate towards certain stamp sets. Some I love from the moment I see them, others I love after I have bought them. Some stamp sets I love from the moment I see them and then have a hard time stamping with them once I have them. (I’m playing around with one of those sets right now…day’s trying to get what I want) Other stamps I’m not sure what to do with them when I see them. But, once I start seeing all the beautiful creations and use the stamp my self I fall in love. It is always interesting to see what stamps I keep reaching for. Dove of Peace is defiantly a Love . I could use it every day and still want to pick it up again and create something new. 
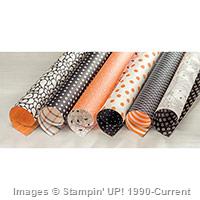
I was looking through some paper from the Holiday Catalog and in the Happy Hountings Designer Series Paper their is a great black paper with stars on it. Perfect for a night sky. I just knew it had to be paired with Dove of Peace. 
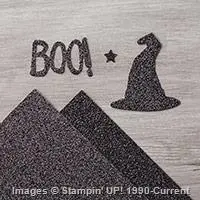
The other little add sparkle comes from the new Black Glimmer Paper in the Holiday Catalog. No Black Glimmer Paper is not just for Halloween!!! 
So, Now I bet I have you wondering how in the world do you make Happy Hauntings and Black Glimmer Paper work with a Christmas stamp. 
Here are the details:
- The card base is Very Vanilla card stock cut at 5 1/2 inches and scored at 4 1/4 inches
- The layers are Black Glimmer Paper(5 3/8 by 4 1/8) and Happy Haunting Designer Series Paper(5 1/4 by 4)
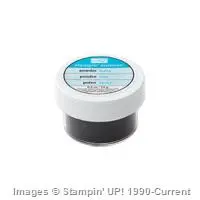
- Stamp the Dove of Peace in Versa Mark ink then sprinkle with black embossing powder. Then Heat set using a heat tool. Make sure to use the embossing buddy before you stamp the dove. Also shake off any access embossing powder before heating the powder. I just love watching the powder turn into a raised embossed layer. So very cool!!!!
- Fussy cut the dove out using your paper snips. If you don’t own a pair of good paper snips then make sure to check out Stampin’ Up! snips. They make the best :>
- Stamp the word believe in Versa mark ink and then sprinkle with black embossing powder. Then heat set. The believe is from the Jolly Christmas Stamp Set
- Back the word believe with Black Glimmer Paper
Make sure you check out all the wonderful items that are apart of the weekly specials.

The supply list:
Supply List
Built for Free Using: My Stampin Blog
Thank You for stopping by Westside Paper Creations. I hope you have a great and wonderful time creating today. See you soon and Happy first day of Autumn! Fall is officially here!!
Jennifer
Posted by Jennifer Spiller on Sep 22, 2015 in Big Shot, Brushstrokes, Happy Happenings, Tags&Labels |
I am always loving what everyone in the blogging world is creating. One of my latest purchases was the Brushstroke Background Stamp Set. I am in love with the idea of creating my own unique backgrounds with a bold stamp. The Brushstroke stamp gives you the look of perfectly watercolored strip background with out actually having to watercolor. How wonderful is that!!!(insert Brian King’s voice) 
For my first time out with the Brushstrokes stamp I wanted to make a bold statement background. Then pair the background with a fabulous sentiment. Happy Happening is a great set jam packed full of sayings for all the happy times. 
I’m completely in love with all the fun founts they used when creating this stamp set. And the sentiments are just to cute. 
Here are the details:
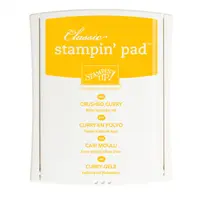
- The card base is Pool Party card stock (only because for some reason I let myself run out of Watermelon Wonder) cut at 5 1/2 inches and scored at 4 1/4 inches.
- The layers are Crushed Curry(5 3/8 by 4 1/8) and Whisper White(5 1/4 by 4)
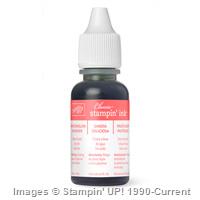
- On the Whisper White layer stamp the Brushstrokes stamp using Pool Party, Crushed Curry, and Watermelon Wonder ink pads. I overlapped the inking some to give a softer change in color
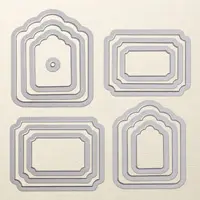
- Stamp the sentiment in Watermelon Wonder ink and cut out using the Tags & Labels Framelits and Dies.
- Cut out a Crushed Curry Label using the same set of dies and your Big Shot.
- Use the re-inkers in Pool Party, Crushed Curry, and Watermelon Wonder to create the watercolor background for the third label. When this has dried cut out using the Tags & Labels Framelits and Dies and your Big Shot
- Use the Whisper White bakers twine to bring everything together.
I thought about adding some sequins to the top left corner or maybe some candy dots or epoxy accents. But, decided that keeping it clean and simple was the way to go. 
It’s easy to create small backgrounds using re-inkers, a aqua painter, watercolor paper, and a clear block. Just add a little ink to the clear block and pick it up with the aqua painter to add to the paper. 
The Supply List:
Thank You for stopping by Westside Paper Creations! I am looking forward to meeting you here again soon. Keep creating:> I would love to here from you! Any thoughts, comments, or questions about today’s card, up comming classes, or stamping in general are welcome. Always remember I am here for you. Have a great day and see you back here soon.
Jennifer