Pages Menu
Categories Menu

Most recent articles

Dove of Peace for Mojo Monday Challenge #412

Posted by on Aug 27, 2015 in Dove of Peace | 10 comments

Mojo Monday  is such a great card sketch challenge.  They bring such a wonderful varity of sketches to us.  I have enjoyed playing along with all the different challenges that I have fallowed for so long now.  Mojo  Monday was one of the first challenges that I started fallowing on a regular bases.  The design team is jam packed full of talented artist!!!!!  This weeks sketch is brought to us by Julee Tilman.  Now normally at this point I am telling you about how things did not go as expected with a sketch challenge and how hard they are for me….Well, today was a little different experence.  I had a idea.  And, it came to me at about 2:48 in the morning yesterday.  I guess I was creating in my sleep.  All I know is I awoke with the idea.  No, I did not get up and make the card then….though some nights that’s not a bad idea.  When I go home from work and started making the card and the dream came together right nicely.

Mojo412

What a great sketch!!! Don’t you just love all the layers.. circles, squares,  and rectangles what’s there not to love!!!!

When I first saw the Dove of Peace stamp set I saw so much more than a Holiday Stamp.  It is so very versatile for so many different occasions.  I guess I had this on my mind when I was sleeping and the vision of today’s card came to me.  Because, what I knew I wanted was to replace the square with the dove.  And  the circle to be silver glimmer paper.  I also, wanted to sear away from Holiday Colors.  While working I continued to create my card.  I wanted a sentiment that was full of faith!  I was going to use Soft Sky Paper and heat emboss the dove in silver. So on and so on…..When I got home I got to work….IMAG1975

Here are the Details:

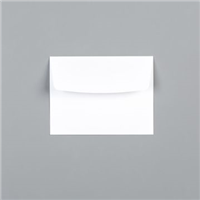
  • The card base is Soft Sky card stock cut at 5 1/2 inches and scored at 4 1/4 inches
  • The layers are Silver Glimmer Paper ( 5 3/8 by 4 1/8), Whisper White (5 1/4 by 4) , and Whisper White ( 5 1/8 by 4 7/8) sponged with Soft Sky ink using a Sponge Dabber
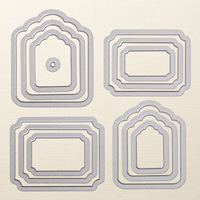
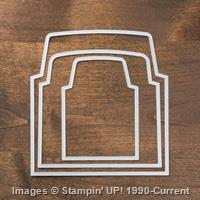
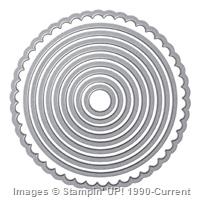
  • The circle is cut from the Circles Collection Framelits  with Silver Glimmer Paper
  • The Banner is Soft Sky(1 3/4 by 5 1/8), Silver Glimmer Paper (1 5/8 by 5 1/8), and Whisper White (1 1/2 by 5 1/8)
  • Stamp the sentiment using Stone Gray StazOn ink on the Whisper White banner.
  • The dove is stamped in Versa Mark ink then sprinkled with Silver Embossing Powder and Heat Embossed.  Then fussy cut the dove out
  • The Ribbon is Whisper White Satin Ribbon that has been colored using the Soft Sky Stampin’ Wright Marker
  • All that is left is to adhere the layers together using multipurpose glue and Stampin’ Dimentionals. The three layers are glued together and then using dimentional added to the card base.  The circle is guled to the sponged layer.  The Banner layers are glued together.  The ribbon is added using glue dots to the back of the banner. This banner is glued to the sponged layer.  The dove is added to the top using dimentionals

Just a few side notes.

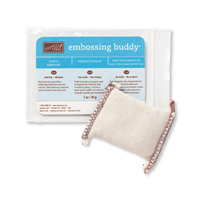
  1. When heat embossing make sure to use your Embossing Buddy.  This will help the embossing powder from sticking where you don’t want it.
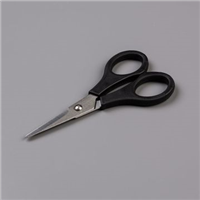
  2. The Paper Snips really make fussy cutting such a breeze.  Make sure you have a pair on hand!!!!
  3. The Dove of Peace stamp set is in the Up-Coming Holiday Catalog.  Available September 1st!!!!  This is the best Stampin’ Up! catalog ever.  You don’t want to miss it……

Here is a video by Stampin’ Up!  all about embossing:

Make sure you stop by Mojo Monday and check out all the great cards created by the Design Team and all those who are playing along!!!

There are all new Weekly Deal’s be sure to check them out!!!!FB_IMG_1440520494762 1

Her is today’s Supply List:

Thank You for stopping by Westside Paper Creations!  I hope you have a great Thursday!!! We are just one day away from the weekend.  Hoping to meet you back here soon.  Much Love

Jennifer

Bundled up for the Holidays

Posted by on Aug 26, 2015 in Acorn Builder Punch, Acorny Thank You | 31 comments

Bundled up for the Holidays Blog Hop Banner


Welcome to InKing Royalty’s August Blog Hop.  Stampin’ Up!’s 2015 Holiday Catalog is just around the corner (it’s live on September 1) – and this amazing book is filled to the brim with incredible bundles at discounted prices.  Who doesn’t love to save with bundles?!?  Today we are Bundled Up for the Holidays as we celebrate these amazing stamp set bundles from the Holiday Catalog.   After you read my post, I  hope you’ll hop over to the next person on the list at the base of this post.

The Holiday Catalog is just jam packed full of new and exciting products.  I am over the moon for the new catalog.  There are so many new punches, stamps, and framelits.  Not to mention, new ribbon, new adhesive, new archival ink, new paper, and BEST OF ALL!!!! ALL NEW BUNDLES!!!  This means you have all new opportunities to save!!! And who does not like to save…I don’t think I know one person who would say “saving is bad, 15 % discount is bad”  It totally excites me that Stampin’ Up! rocked the Holiday Catalog.

In preparing for the InKing Royalty Blog Hop I was thinking about all the different bundles.  Did I want to use a Christmas Bundle, Did I want to use a Halloween Bundle, Did I want to use a Fall Bundle.  Well, I decided to use one of the Bundles that was at the top of my Fall Must Haves.  That Time of year when you are just starting to Bundle Up!!!!  stampin-up-acorny-thank-you-stamp-set-acorn-builder-punch-500x500

Acorny Thank You is such a cute new stamp set.  I love the acorns and that one of the sentiments actually sates “Dropping in to say Hi!” This stamp set pairs with the new punch Acorn Builder Punch.  In designing today’s card.  I knew I wanted to use the New Designer Series Paper (Holiday Catalog)  Into The Woods.  All the designs are hand painted then reproduced.  How cool is that!!!   I also knew that I wanted to use three acorns that looked as though they were falling… To pair with the Sentiment.

Stampin-Up-Into-the-Woods-Designer-Series-Paper-500x435

IMAG1967

Here are the Details:

  • The card base is Daffodil Delight card stock cut at 4 1/4 inches and scored at 5 1/2 inches.  “The Brian King Way”  I wanted a tall looking card.  So it works well if your fold is at the top of the card  because  it gives the illusion of being taller!
  • The layers are old olive (4 1/8 by 5 3//8)  And Into the Woods designer series paper cut to (4 1/8 by 2 3/4)
  • Add the new Into The Woods  Cotton Ribbon (Rich Razzleberry) to the designer series paper using glue dots on the back of the paper.
  • On Whisper White Paper stamp the Acorn images in Daffodil Delight and Tangelo Twist.   Also, on Whisper White stamp the Acorn tops in Blackberry Bliss and Soft Suede.  Punch all these images out using the Acorn Builder Punch.
  • Using Stampin’ Dimensionals adhere the tops of the acorn to the color bottoms
  • On Whisper White card stock stamp the saying by masking of the hi and using Soft Suede ink.  then stamp the image a second time masking off the dropping in to say using Blackberry Bliss ink.
  • Cut out the sentiment using the Tags & Labels Framelits.  Also, cut out a larger frame using Old Olive card stock
  • All that is left is to adhere everything together using Stampin’ Dimensionals and multipurpose glue. IMAG1970

I love to take a few extra minuets and decorate my envelopes while I have everything pulled out.  The envelope liner Framelits makes this a breeze.   I also masked off the sentiment again and added the Hi to the front of the envelope.  IMAG1972 1


Price: $110.00

Supply List

Built for Free Using:  My Stampin Blog

 Thank you for stopping by today.  I hope you’ll hop along to the next stop on the blog hop. There’s lots of inspiration to be found in this group – and you don’t want to miss it!

Jennifer