Pages Menu
Categories Menu

Posted by on Jul 18, 2018 in Big Shot, blog hop, Christmas, Embossing, I don't want to wait till Christmas, InKing Royalty Blog Hop, Nature Sings, Rooted In Nature, Subtle Dynamic Textured Impressions Embossing Folder, Subtle Dynamic Textured Impressions Embossing Folder | 31 comments

Joy to the World

Holidays

Welcome to InKing Royalty’s July Blog Hop! This year’s Blog Hop themes are inspired by popular songs – this month’s song is “I Don’t Want to Wait ’til Christmas.” We are half-way through the year, so there’s no better time to start thinking about the joy of Christmas. We are excited to share our creations with you today! After you read my post, I hope you’ll hop over to the next person on the list at the base of this post.

Today I promise to be short and sweet! That way you can get on with the awesome Christmas themed blog hop!!! I adore making holiday card!! Normally once I start, it is about all I think about!!!  I just love the creativity that flows during the Holidays!!!

My card today features one of my favorite stamp sets Rooted In Nature.  This awesome set was combined with a watercolor card that I found on Pinterest!   Pinterest is a great place to find ideas for crafty projects!

Rooted In Nature Stamp Set

Rooted In Nature Stamp Set

I love this set so much it was the first of my The Creative Way series!  I really enjoyed crafting with this stamp set for that series.  Today, I’m using a project that I started for The Creative Way, but did not finish it till yesterday morning.  I was thinking about what I wanted to make for you guys and remembered that I had started this card and never finished it!  Well, it was time to correct that!!!

Joy to the World


To be real honest this watercolor was done almost two full months ago!!  I really do not recall the colors I used. My best guess is Night of Navy, Blueberry Bushel, Mint Macaroon, Soft Sea Foam,  and Gorgeous Grape (or some purplely color).

Peace

  • The first thing I did was stamp the trees. This was done by inking the stamp then spritz it slightly with water before stamping.
  • The second step was to add in the sky. This was done by wetting the background slightly and dropping in color, working from the top to the trees.  As I approached the trees The color was filled in as much as possible.
  • The final step of the watercolor was to add some snow. White craft ink does a wonderful job at this
  •  Now, it was time for a sentiment!!! The joy to the world was taken from a larger sentiment in the Nature Sings stamp set. A little masking and I had the perfect words!!!
  • Another way to create a similar background would be to create the sky and ground. Then when the background was barely wet you could stamp the trees.  This would be much easier than trying to paint around the trees
  • And just in case you missed it I used two of my new favorite products the Merry Merlot paper and the Subtle Dynamic Textured Impressions Embossing Folder

Thank you for stopping by today. I hope you’ll hop along to the next stop on the blog hop, Jackie Beers at Blue Line Stamping There’s lots of inspiration to be found in this group – and you don’t want to miss it!

No card is complete with out a coordinating envelope!!!  The watercolor wash was created with the new watercolor pencils, available in August, and a aqua painter.  Quick and simple way to add a little extra to your cards! Holiday Card

The envelope used here has a little toothy feel to it.  The envelope took the water okay…If I was to make this envelope agin I might would try making my own envelope out of watercolor paper (light weight) or shimmery white paper. Another option might would be to use ink refills cause they might require less water to get the desired look!

Each of your comments makes me smile! Please, comment HERE.

Thank you for hopping along with us. If you get stuck during the Blog Hop, please use this line-up as a guide:

  1. Brian King at Stamp with Brian
  2. Julie DiMatteo at The Paper Pixie
  3. Sue Jackson at Just Peachy Stamping
  4. Robbye Hamilton at Miss Hammie’s Crafts
  5. Jennifer Spiller at Westside Paper Creations
  6. Jackie Beers at Blue Line Stamping
  7. Rachael Shedeed at Bluebonnet Stampin’
  8. Pam Morris at Tap Tap Stamp
  9. Shawn de Oliveira at Shawn Stamps
  10. Candy Ford at Stamp Candy
  11. Imogene Thomas at MomoMakes.com
  12. Nina King at InkPaperSequins
  13. Lynn Kolcun at Avery’s Owlery

There are a few Stampin’ Up! specials this month. One is a Designer Series Paper Sale that is quite special!! Buy 3 get one FREE!!

Sale

The second is for those who Join Stampin’ Up!!  Everyone who Joins Stampin’ Up! to save on their favorite stamps, inks, and papers will receive a FREE family of inks!!! That’s 10 ink pads for FREE! How awesome is that???

Special


The Creative Way – A Product Feature

I adore sharing with you guys all about one product each month! This months feature product is the color Granny Apple Green!! I love the modern fresh feel of this awesome color!!! To see more about Granny Apple Green check out this month’s first post in the Series!

Day 2

Day 3


Thanks for stopping by Westside Paper Creations!  I so enjoy sharing with you guys!  I hope you will continue to hop along to see all the amazing Christmas projects the Inking Royalty have in store for you!!

Peace-

Jennifer

Read More

Posted by on Jul 12, 2018 in Christmas, June 2018, Stylish Christmas, The Creative Way | 0 comments

Season’ Greetings take two…

Yesterday I shared a clean and modern feeling holiday card. Today we are going to take a second look and the process that I took to get from yesterday’s card to today’s final card.

The Creative Way – A Product Feature

We started with a very clean and modern card that featured a combination of greens and gold. I really wanted to keep the feel of the original card.  Yet, I wanted to kick it up a notch using the holy leaf distinktive stamp from Stylish Christmas.

Modern Christmas Card

There is so much that I love about this card!! My favorite part it that it was quick and easy to create. Witch means that it is perfect if you are going to mass produce Holiday Cards. You can see more about this card here

The question is what if you wanted to add a little Jazz to this design.  By the way, I think about Stylish Christmas as smooth Jazz…

So, the first step was to decide did I really want to keep the design clean and simple. And the answer was yes!!!  The second question was did I want to add any additional colors.  The answer was no…So then I stamped the leaves in Granny Apple Green (this month’s The Creative Way product feature) and I was in love!!! How, exactly was I going to add this beautiful leaf into this card???

This is what I did…I fussy cut the leaf I had just stamped.  I used it as a template moving it around on the card trying to decide exactly where I wanted the leaf.

Holiday Card

This version of the card is quite lovely!! I really love how the leaf adds a little holiday flair!! I think you could leave it here and it would be beautiful!! Just as beautiful as the original.   The thing was, The card did not feel like it had given me everything it had to offer…. So, I kept tinkering…

Here you can see where I used my “template” trying out options of places to put a second leaf.

Holiday Card

This is when I know the card was Completed!  I love how the leaves play off each other.  Just like in Jazz…

So the absolute final touch was to create a coordinating envelope!! Our envelope are just like the album cover of days gone by!! The album cover was how you knew the record inside was going to be awesome!!! The same is true for out envelopes! The envelope shows that there is something extra special inside!!!

Who new one little leaf stamp had so much to offer!! 

Each of your comments makes me smile! Please, comment HERE.


There are a few Stampin’ Up! specials this month. One is a Designer Series Paper Sale that is quite special!! Buy 3 get one FREE!!

Sale

The second is for those who Join Stampin’ Up!!  Everyone who Joins Stampin’ Up! to save on their favorite stamps, inks, and papers will receive a FREE family of inks!!! That’s 10 ink pads for FREE! How awesome is that???

Special


The Creative Way – A Product Feature

I adore sharing with you guys all about one product each month! This months feature product is the color Granny Apple Green!! I love the modern fresh feel of this awesome color!!! To see more about Granny Apple Green check out this month’s first post in the Series!

Day 2

Day 3


I hope you enjoyed seeing how you can make several different versions of a card from one basic design!  Have a great Thursday!! I truly hope you find time to be creative, even if it is 5 minuets!!!

Peace-

Jennifer

Read More

Posted by on Jul 11, 2018 in Christmas, Distinktive stamps, Lemon Lime Twist, Stylish Christmas, Stylish Christmas | 0 comments

Season’s Greeting to a modern holiday

This is always the time of year I start thinking about making Holiday Cards!  This is my little jump-start that always saves me when It gets down to the time to send Christmas Cards!  One of my most wanted stamps is the new to me, Stylish Christmas Stamp Set! This stamp is made using the new distinktive style of rubber stamps.  This means you get lots of detail from the stamp!!! I love wood mounted stamps!! So, I was super excited that Stampin’ Up! Came up with this new way to really bring out the awesomeness of rubber stamps!!! Today’s card features the greeting from this set for a clean and modern holiday card.

Stylish Christmas Wood-Mount Stamp Set

Stylish Christmas Wood-Mount Stamp Set

The Creative Way – A Product Feature

This month’s The Creative Way is all about the color Granny Apple Green.  This color is so fun and full of life!! I choose this particular green cause it is perfect any time of the year!!! Today’s card happens to be a Christmas Card, but change the sentiment and a little stamping you could have a fun Summer or Spring time Birthday Card. Even better and use the basic design for a nice masculine card!!! The possibilities are quite fun to think about!  I’m going to share with you a card that uses a fun color combination!  And how you can get a very modern card.  Then, tomorrow I will be sharing a stepped up version of the card that will open the possibilities up even more!!!

The color combination is based upon the fact that Lemon Lime Twist and Granny Apple Green are two different tones of one color. Without getting two deep…basically, they are the same color. Lemon Lime Twist is a lighter shade of Granny Apple Green.  They are both yellow-greens better know as Chartreuse. This color was give the name Chartreuse because it resembles a French liqueur of the same name.  Anywhoo, The third color Shaded Spruce was chosen because it was what looked good to me visually with the other two colors. Old Olive would have worked as well and would have been a darker version of the yellow-green pallet

Modern Christmas Card

  • This card was quite simple to make with a little masking, ink blending, and heat embossing
  • The green stripes were made by masking off sections of the card panel. Then using the sponge brayer to add the ink.
  • To add ink with the sponge brayer you want to start with light pressure and build the color up
  • The smaller stripes are a combination of two colors.  One is Lemon Lime Twist and Granny Apple Green .  The other is Granny Apple Green and Shaded Spruce
  • The final step was to add the heat embossing in Gold
  • The card base is the New Merry Merlot.

Without giving you too much more color theory, Merry Merlot was chosen as the card base because it is a complimentary color to the yellow-greens uses.  This basically means the card base makes the colors of the card pop!!!  It also means that they are across from each other on the color wheel. Well, now that I have sufficiently board you with color theory, ? I hope you will stop back by tomorrow and see how I step this card up a bit!

Each of your comments makes me smile! Please, comment HERE.

We will turn this classically modern card into a fresh up to date card with a modern vibe….


There are a few Stampin’ Up! specials this month. One is a Designer Series Paper Sale that is quite special!! Buy 3 get one FREE!!

Sale

The second is for those who Join Stampin’ Up!!  Everyone who Joins Stampin’ Up! to save on their favorite stamps, inks, and papers will receive a FREE family of inks!!! That’s 10 ink pads for FREE! How awesome is that???

Special


The Creative Way – A Product Feature

I adore sharing with you guys all about one product each month! This months feature product is the color Granny Apple Green!! I love the modern fresh feel of this awesome color!!! To see more about Granny Apple Green check out this month’s first post in the Series!

Day 2


Thank you for stopping by today and spending a little time with me!  I always enjoy sharing my thoughts with you guys!! Always feel free to contact me if you ever have questions about anything you see here at Westside Paper Creations.  Go and find a moment to be creative my friends!

Peace-

Jennifer

Read More

Posted by on Jul 22, 2017 in Christmas, Christmas 2017 | 0 comments

Christmas Fun!

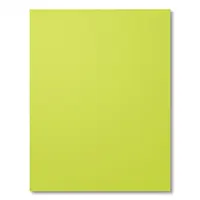
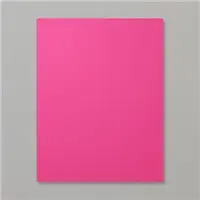
I’m having a blast making Christmas Cards during my Christmas in July Instagram take over. Every day ( well almost) I have been posting pictures of Christmas Cards that I’ve made this month. With a few process pictures thrown in for fun! I have found that I’m completely in love with Lemon Lime Twist for the Holiday’s. It pairs well with Real Red, Flirty Flamingo, and Melon Mambo. Silver is amazing with it! As well as copper!

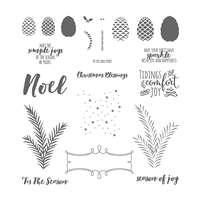
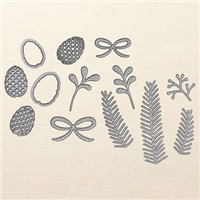
This modern color combination pairs perfectly with the Christmas Pines Stamp Set and coordinating dies.

This set appeared in the 2016 Holiday Catalog and made its way into the 2017 Annual Catalog! I’m so very glad that it did! This set is Awesome! especially if you love a modern with twist of classic!!

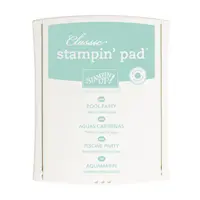
  • The background is stamped with Pool Party ink.
  • The middle layer is a combination of elements from the coordinating dies, Pretty Pines
  • The top layer is silver embossing and Melon Mambo popped up with stampin dimensionals after fussy cutting around the image.

Each of your comments makes me smile! Please, comment HERE.

I would love for you to join my team. My stamping friends are the best. When you join under me not only do you get to be apart of my team. But, you will also be a member of the InKing Royalty! The best stamping community around!!! Stampin’ Up! has a great July Join event going on!!! So want you join me now???? If you have any questions about Stampin’ Up! or Joining Now, please feel free to contact me at westsidepapercreations@gmail.com Join in July, get Free products!!! Everyone who joins in July will receive the Carols for Christmas stamp set. Don’t know that set???? It is bran new for the Holiday Catalog!!! You also get the Essentials Gift Pack. This pack includes paper snips, grid paper, snail adhesive, a bone folder, and two D stampin’ blocks. Exclusive to Christmas in July!!

When you spend $50 in July Stampin’ Up! will give you $5 to spend in August!!! For every $50 you spend in July!!! Let’s all say Merry Christmas in July!!!

Below is a list of products used to make this card! If you have any questions feel free to contact me at westsidepapercreations@gmail.com

Supply List

 Thanks for stopping by!  I hope each of you are getting your creative spirit on this Saturday!!!  Happy Stamping!!!
Peace my lovelys-

Jennifer

Read More

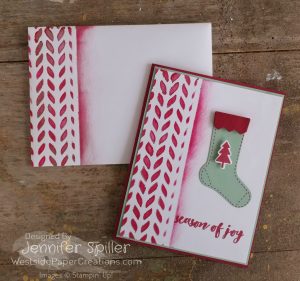
Posted by on Dec 13, 2016 in Christmas, Christmas Pines, Hang Your Stockings, InKing Royalty Blog Hop, Mixed Media, Star of Light | 7 comments

Winter Wishes

winter-wishes-blog-hop

Welcome to InKing Royalty’s December Blog Hop!  While Stampin’ Up! demonstrators are actively ordering from the 2017 Occasions Catalog and earning products from the 2017 Sale-a-Bration brochure, we are also getting ready for the upcoming holidays.  We are excited to share some fun winter-themed projects with you!  Today’s Winter Wishes Blog Hop is filled with inspiring projects that feature each artist’s take on Winter.  After you read my post, I hope you’ll hop over to the next person on the list at the base of this post.

Recently I was scrolling though Instagram, as I often do, and discovered a great post by Fox and Hazel where she used acrylic paint to decorate her envelopes.  So, I pulled out my paints and got to work.  When I finished the envelope I decided that I liked them so much that I would make matching cards.   The supplies I used are Decorative Mask (aka stencils) acrylic Paint in various colors, a palette knife, a paint splatter, Stampin’ Up sponges and Stamps, and a pint pin to address the envelopes.

20161212_090958

The first envelopes I made I simply scraped the paint across the envelope or card layer using the palette knife.  If you do not have a palette knife you could use an old gift card for this.   At this point, I also added splatters of paint using the funny looking splatter tool and my finger.

20161212_085122

I started off by testing several colors but settled on this variety of paint colors.  Copper, Pewter, light Gold, White, Hookers Green, Cadmium Red dark, and ocean blue/green

20161212_090800

The next step was to add stamping to the envelopes and the cards.  I used a variety of stamps mostly current stamps by Stampin’ Up!  A few tips.  The photopolymer stamps seem to slide around a little on the paint.  So you just have to be careful stamping over the paint.

20161212_090603

20161212_085245

Then I decided to pull out the Decorative mask and the sponges.  I first tried to do this with the palette knife, but the effect was quite bold.  And more in your face than what I was looking for.  So the sponge was the way to go.  The sponge and paint added a soft look that is pleasing to the eye!

20161212_085145

There are several ways to make matching cards!  Different stamps and colors add a whole new feel to basically the same design.

20161212_085212

The deer antler card is one of the cards that I tried the palette knife with the Decorative Mask.  You can see how much bolder it is compared to the envelope below it.

20161212_085300

The Noel card did not photograph very well.  But, it is truly gorgeous.  I love the paint on the crumb cake base combined with the gold heat embossing!

20161212_090525

All that is left is to address the envelopes with your paint pen.  The Gold and Sliver gel pins would look wonderful with the stenciled envelopes.

P.S. The address below is made up.  I just wanted you to know what the envelopes look like finished. (even with my crappy handwriting)  How cool would it be to live on Stampin’ Ave.

20161212_085035


I made a video for y’ll, so that you can see the process of making the  cards!  I hope you enjoy it :>

Thank you for stopping by today.  I hope you’ll hop along to the next stop on the blog hop, Becky Volpp at InkBlossom with Becky.  There’s lots of inspiration to be found in this group – and you don’t want to miss it!  Thank you for hopping along with us. If you get stuck during the Blog Hop, please use this line-up as a guide:

  1. Brian King at Stamp with Brian
  2. Lisa Pretto at InkBig Academy Stamps
  3. Pam Morris at Tap Tap Stamp
  4. Candy Ford at Stamp Candy
  5. Jennifer Spiller at Westside Paper Creations
  6. Becky Volpp at InkBlossom with Becky
  7. Robin Myren at Songbird Designs by Robin
  8. Karen Browning at StampWithMeKZB
  9. Lory Robinson at The Robin’s Nest Designs
  10. Shawn de Oliveira at ShawnStamps


Supplies:

  • Stamp Sets: Christmas Pines, Hang Your Stockings, Star of Light
  • Ink: Cherry Cobbler, Versa Mark, and  Basic Black
  • Other: Gold Embossing Powder, Craft Sheet
  • Paint and other Paint supplies.


I hope you will hop along with all the Royal’s today!  I am sure you will find lots to love along the way!  Have a great Tuesday.

Much Love,

Jennifer

Jennifer

Read More