January Lifestyles Blog Hop

Welcome to our Blog Hop and a happy early Valentine’s Day to you! We have some great ideas, inspiration, tips, resources and how-to for you to have some fun this Valentine’s Day as you move along through the blog hop.
You may just be starting the blog hop or may have come from Beth McCullough at Stamping Mom on our Living with Style Blog Hop. If you get off track at any time, the full lineup below will help you move along from blog to blog so you make sure to see and learn from all of the articles featured here today.
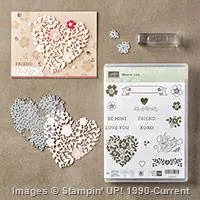
I am very excited to be participating in the Lifestyles Blog Hop. And I am even more excited that Kim Barrera is joining me as a Guest Designer. Kim has created a wonderful three-dimensional project that is perfect for all your Valentines Chocolate! She used Bloomin’ Heart Thinlit Dies and the Bloomin’ Love Photopolymer stamp set . This stamp set is available in a bundle with the Bloomin’ Heart. This means that Stampin’ Up! is giving you a 15% savings when you purchase a bundle.

Bloomin’ Love Bundle
15% Savings

Kim used her cricket machine to cut the box. After cutting the box and assembling it she used Vellum and Bloomin’ Heart Tinlits Die to create the beautiful vellum overlay. The overlay is backed with a solid heart and topped with cupid…And who doesn’t love cupid and his arrow. Next, Kim added “My Valentine” to the top. Finally, topping it off with a pretty bow.
A few tips:
- Backing the vellum with a solid heart really brings out the soft elegance of the Bloomin’ Heart Tinlits
- Assemble the top side together first. Then use the bottom of the box to fill with candy.
Now for my project. I decided to step out of my box of card making and do something a little different. I have been working with different watercolor mediums that I received as Christmas Gifts. I have really enjoyed learning each medium. Some I am loving more than others. One of my new favorites is Brusho. I used it for the card I made yesterday. You can see that card here. I had so much fun making that card that I decided to work with it again for today’s project. I have had in the back of my mind to use stamps ( in particular Stampin’ Up! Layered Letters) to make a piece subway art. Well, I really didn’t make subway art. But, I do love what resulted!

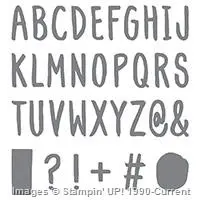
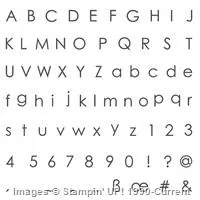
Layered Letters Alphabet
I have been trying to make my life more faithful. I have many ideas about how to combine stamping and art into a more faithful life. With this in mind and thinking about what Valentines Day means to me. I looked up quotas about Love. I found one from Songs of Solomon that was perfect. Every time I read the quote it will remind me of love. All love (not just romantic) . I placed this today on the wall at work. Just were I can see it several times a day. It will remind me that Love is what life is all about. 
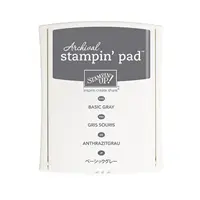
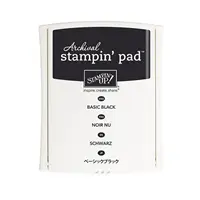
The flower is Large Peony 3 by The Tone Stamp Co. They make some amazing flowers. I also used the leaves from Large Peony 1. These were also wonderful Christmas Presents. On art board I stamped the flower. Masked it using a post it note. And stamped the leaves right below the flower. Also, masking them so that they looked layered. The Ink I used was Light Onyx Dye Ink. Then using a Stampin’ Block, I sprinkled out Brusho onto the block. Using some water and a few paint brushes I painted the flower and leaves. Then added the stem. ( I need practice with making stems better) I let this dry. Then added the leaves along the stem and painted. At this point I switched over to Stampin’ Up! ink and Layered Letters. The ink used was Basic Gray. I stamped each letter twice. I found it quite easy to re-stamp each letter with out using a tool to help line it up. After stamping the quoit from Songs of Solomon, I added Brusho using two different blues and yellow. This time I added the Brusho directly to the art board then added water to the board using a paint brush.
A few tips:
- I have a lot of paint brushes. I could not have done this with out the Silver Brush Black Velvet. They were yet another Christmas present. These brushes truly made the detail work so much easier.
- I adore how easy Layered Letters are to work with. They make wording so very easy. I stamped each letter individually. This seems to work quite well
- When adding the final washes of Brusho. Do not use too much water. The board will begin to warp. I held mine down with the end of a paint brush over one of the letters near where I was working.
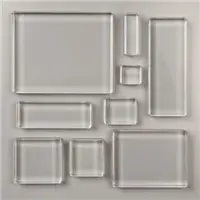
- The largest Stampin’ Block (clear block F) is perfect for watercolors. I like to add a little Brusho or tube watercolor to the block and use it as a pallet.
The next stop is Natalie Bradley at NatalieBradley.com on Living with Style Blog Hop! Thanks for visiting and I hope to see you again next time around!
Blog Hop Lineup:
- Natalie Bradley at NatalieBradley.com
- Kristy Stewart at Under My Gabled Roof
- Lory Robinson at The Robin’s Nest Designs
- Pam Baker at The Birch Cottage
- Sherry Macdonald at Elite Physiques
- Lisa Milligan at Life on Merlin
- Beth McCullough at Stamping Mom
- Jennifer Spiller at Westside Paper Creations
Here is the supply list: The Brusho, Silver Brush Black Velvet, and the Art Board you can find at Dick Blick. The Tone Stamp Co. has the Large Peony 1 & 3 stamp sets and the light onyx ink. And Cricket has the box template.
Built for Free Using: My Stampin Blog







 This Site Proudly Designed & Maintained by Integrant Services, LLC